MuleSoft Composer for Administrators and Business Analysts – What it is and how to get started
In this two part blog series, we are going to discuss the MuleSoft Composer. Looking at the setup, how to build simple and complex flows and how to automate the integration between systems while adhering to no code integration.
In this first blog, we are going to discuss Composer setup, requirements & restrictions, flow building blocks, and design checklist. The second blog will cover composer flow implementation and we will look at two examples.
Contents:
- What is MuleSoft Composer?
- Requirements & Restrictions
- How to set up Composer
- Composer flow building blocks
- Composer flow building checklist and design checklist
- Automation Credits
1. What is MuleSoft Composer?
MuleSoft Composer is a no-code integration tool from MuleSoft and Salesforce. With composer it is easy to build process automation for data using clicks instead of code.
Composer is a handy tool for Administrators OR Business Analysts who do not need the help of development/C4E teams to make quick integrations for their business.
When you create a secure process to connect the information stored in different systems, you build a real-time, integrated view of your customers and business.
To automate processes with Composer, you can build a Composer flow containing steps like the following:
- Select the specified data from a System, for example, Google Sheet/Salesforce/Workday etc.
- Perform actions on data like copying it to another system
2. Requirements and Restrictions:
MuleSoft Composer has the following restrictions:
- The maximum supported number of concurrent users is 25.
- You must purchase a MuleSoft Composer licence, which is separate from the Anypoint Platform licence.
- If your Company network has strict firewall rules, then your Network Admin must add *.mulesoft.com to the list of allowed addresses.
- You must relax any IP restrictions for any Data sources/targets you create as part of the flows.
- Composer does not support mobile platforms.
MuleSoft Composer has the following requirements:
- You cannot use incognito mode or private browsers to access Composer
- If you use Chrome or Firefox, you must allow third-party cookies.
- When you connect to any other system, follow the requirements and restrictions applicable to that connection.
- Composer fields with date values use the YYYY-MM-DDThh:mmZ format.
3. Set Up Composer:
Once you’ve purchased MuleSoft Composer, it automatically creates a MuleSoft Composer organisation and sends a welcome email to help you get started and connected.
After successfully logging in, you can invite your users to access the MuleSoft Composer organisation.
I. Accessing Composer for the first time:
As you are the organisation’s primary administrator, follow the below steps to start with your Composer account:
- Check your email, follow the welcome email from MuleSoft Composer and Accept Invitation.
- In the Create Account form, fill in all required fields and click Create Account.
- Log in to MuleSoft Composer using the username and password you just created.
- In the Register a Verification Method dialogue, select one to set up your multi-factor authentication.
- The MuleSoft Composer overview page will now appear.
II. Invite Users to access MuleSoft Composer:
After you access your MuleSoft Composer organisation account using administrator credentials, you invite other users to your new Composer account.
- In the Composer sidebar, click Settings and Users.
- On the Users page, click Add Users.
- In the Invite New Users window, enter the email addresses you want to invite, separated by a comma.
- Select the permissions you want to apply to the group of users and click Invite.
- Permissions available:
- Builder – to create and manage the flows.
- Administrator – to add and manage the users and create and manage the flows.
- Permissions available:
The invited users will get a welcome email that they need to follow to get started with Composer.
III. Monitor Pending invitations:
After inviting users, you can monitor the pending or unaccepted invitations as Admin.
- In the Composer sidebar, click Settings and Users.
- On the Users page, click the Pending Invitations tab.
- If the invitation is older than 14 days, you can select Resend Invite to re-send or Revoke Invite to revoke the invitation.
IV. Manage Users:
As Administrator, you are responsible for managing the MuleSoft Composer users to meet your organisation’s compliance rules. The following user management tasks are available:
- Change User roles
- Reset User passwords
- Reset User multi-factor authentication (MFA) methods
- Delete Users
4. Composer flow building blocks:
A flow is actually an automated process between two or more systems. For example:
- Copy all new records in Salesforce org to another org.
- Check the data in a System every 15 mins, and if the data changes, copy those changes to Tableau etc.
Understanding the basic building blocks of the Composer flow makes it easier to build and test the flows. Below are the building blocks of the Composer flow:
- Triggers
- Actions
I. Triggers:
The first step of a flow is always a trigger. We can think of this as the Source of the flow. We have two options for this:
Scheduler
If you want to trigger the flow based on any fixed intervals of time over any events
from the end systems, then you can go with this option.
Connections to actual Systems
This can be used when you want to invoke the flow on any events from the end systems that you selected in the source.
II. Actions:
An Action is a task you want to perform once a trigger event has occurred. Actions can be any data retrieval from any connection or Flow Control steps like If/Else or For-Each. You will have data fetched from the trigger source and any action previous in the flow to be used.
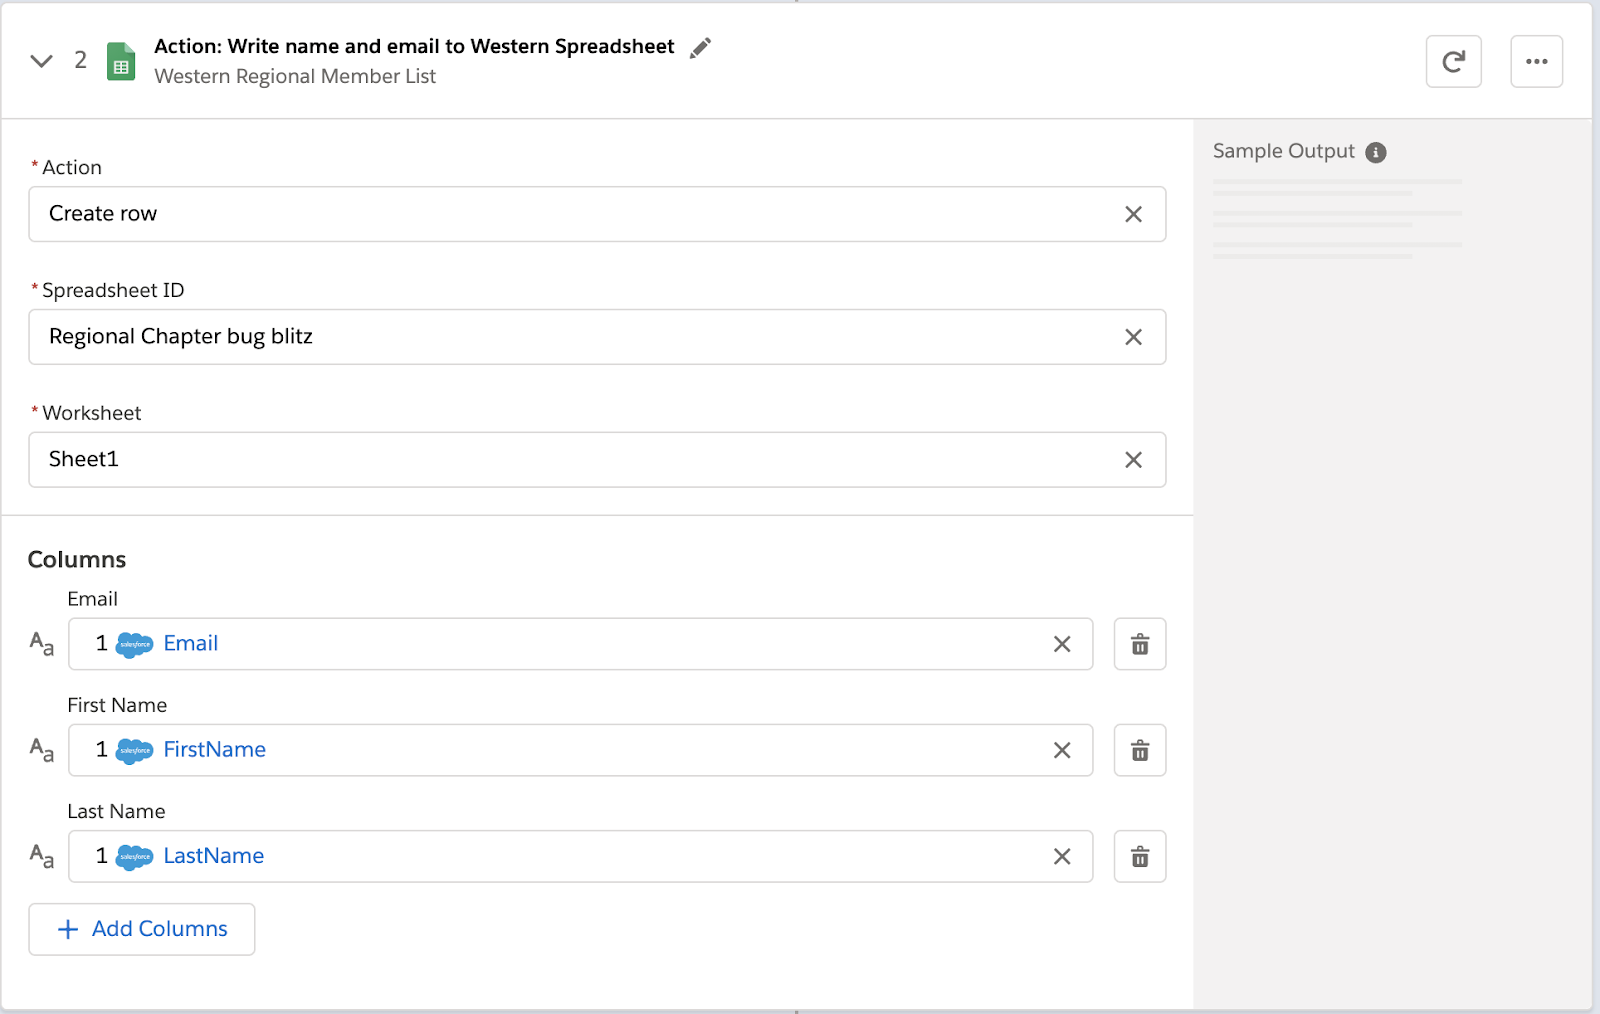
In the following example, Admin has created an action to create a new row in the Google spreadsheet connection.
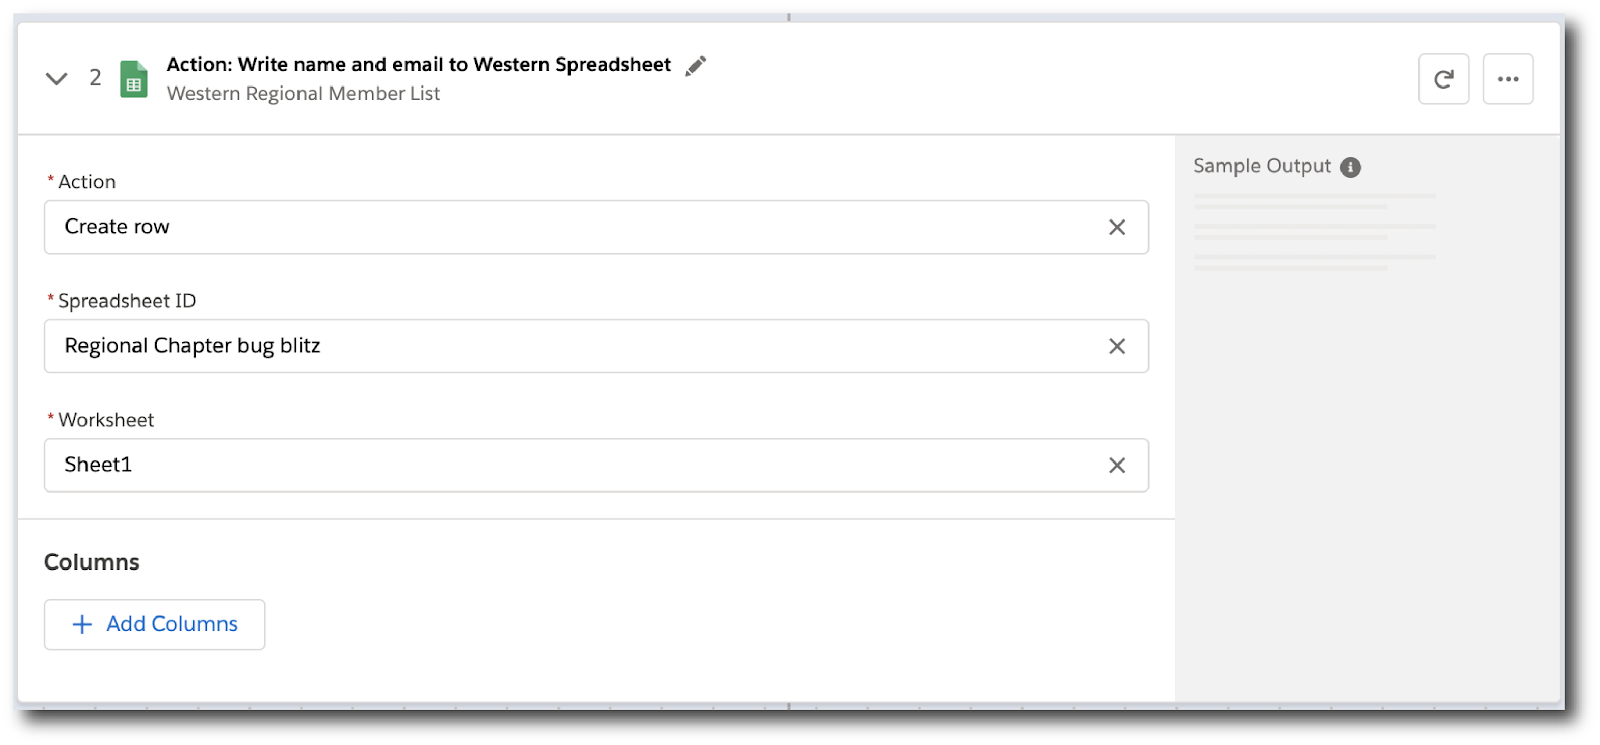
- Action is the task to be performed.
- Spreadsheet ID is the name of the spreadsheet this action uses. You can select the dropdown and choose one of the spreadsheets which are part of the Google spreadsheet connection.
- Worksheet is the name of the worksheet you will add to the row.
- Columns are the actual sheet columns for which you will map the trigger or any previous action fields.
III. Data pills:
Data pills contain the complexity of a data structure, making it easy to map data from triggers or previous actions. Using data pills, data mapping can be simple or complex.
- You can connect two or more data pills by mapping them to the same field, column, or other data target
- By selecting Custom Express fx, you can create a custom expression instead of simply mapping data pills to data targets.
III. Flow Controls:
If you need to add logic to the flow beyond actions, you can use one of the For-Each or If-Else blocks.
- For-Each loop:
For Each loop acts on each record in a list. For example, if the flow fetches a set of contacts from Salesforce, you can loop through the list and copy each record to a row in a Google Sheet. The input list is chosen from the list of records available from a previous action. In this example, a previous action fetched all the contact records associated with a single account.

- If-Else block:
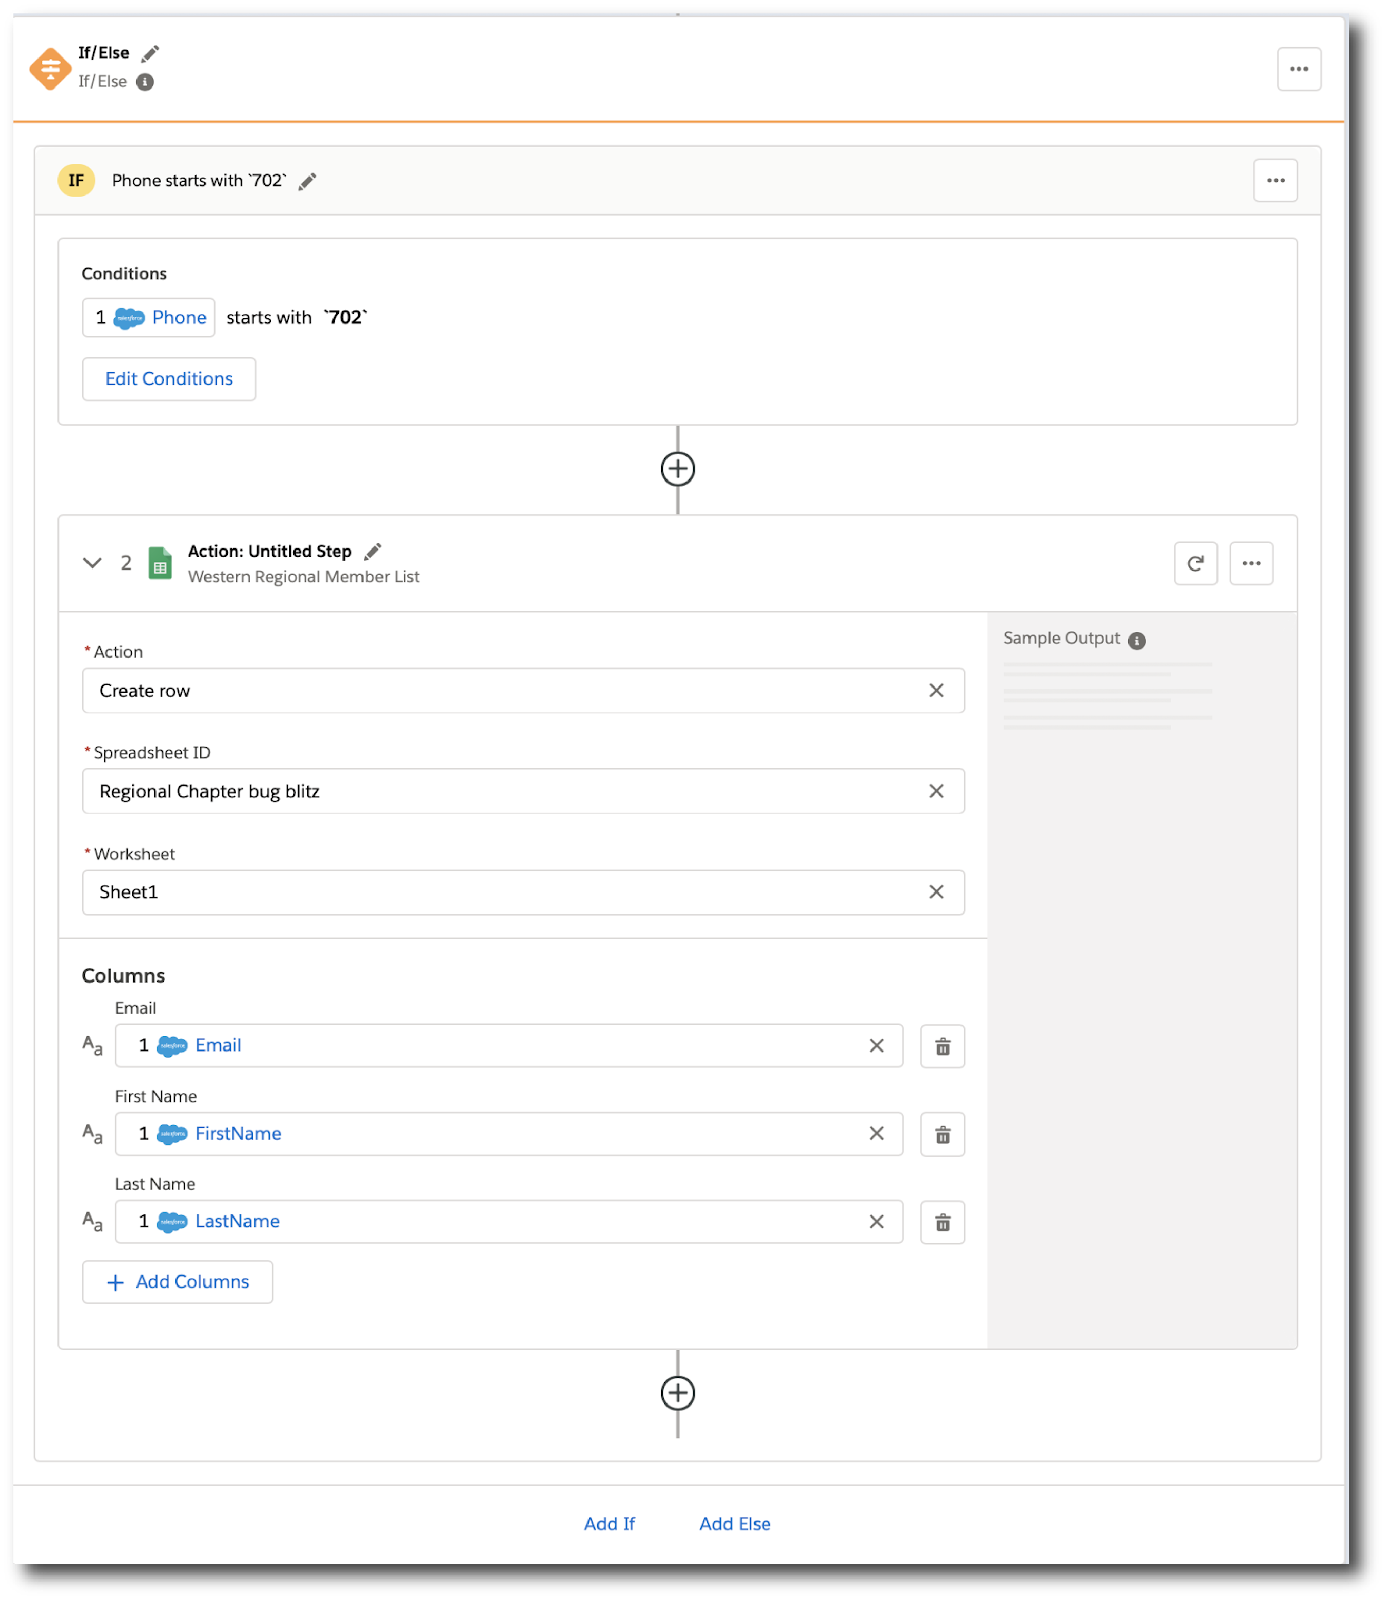
An If-Else block takes a single record coming from the trigger or previous action and evaluates it according to the conditions specified. An action must be specified in the matching condition and optionally else block.
The below example shows only one If branch: if the phone number on the record starts with 702, then the first and last names are copied to a row in a Google Sheet. If a record doesn’t meet the criteria, no action is taken, and the flow moves on to the following action since there is only one branch.
You can add up to 20 conditions per branch and as many actions per branch as you need. Click Add If to add branches. After specifying all the branches you need, you can specify a fall-through action with Add Else.
5. Composer flow building checklist or Design checklist:
Before building your Composer flow, gather the information that you need.
- The username/password or credentials for every data source and target.
- The trigger for your flow.
- An ordered list of the steps and the logic to perform over the trigger data to be sent to the target system.
6. Finally, Automation Credits:
Your MuleSoft Anypoint Platform subscription may include Automation Credits (if it is purchased) that you can use with either of the following or a combination of both:
- MuleSoft Composer
- MuleSoft RPA
The following table shows the conversion rates between Automation Credits and Activities.
| RPA Bot Minutes | RPA API Calls | Composer Tasks |
| 1 M.A.C = 2 | 1 M.A.C = 100 | 1 M.A.C = 100 |
**M.A.C = MuleSoft Automation Credit
The usage summary page enables you to view your monthly tasks and credit usage per flow for your organisation. All Composer users in your organisation have access to this page. The monthly summary usage report is usually available five business days after the month’s close.
Reports are available starting from September 2022.
Conclusion
So in this blog, we have learnt:
- What MuleSoft Composer is.
- How to set up Composer.
- Composers main building blocks.
- Design checklists.
- Automation credits
In the next blog of the series, we will run through a step by step Composer flow implementation. Giving you hands-on experience with Composer so that you can set it up for your own business.
The Devoteam S Platform team is ready to help!
If you are planning to use MuleSoft Composer for your business or want the help of our experts for a different project then our team is available to help. We have a range of services available that help to grow your business.
References:
- MuleSoft Composer documentation – https://docs.mulesoft.com/composer/ms_composer_overview

